This series introduces the foundation for web development using basic HTML and CSS markup. It is intended for those who have zero web development experience, though it might be a solid "foundation" refresher for anyone.
HTML & CSS Basics Series →
This post builds off the previous tutorial What exactly is a website? An HTML overview in the Web Development Basics Series. You’ll need to grab the code from the previous post to follow along with the steps below.
After completing the prior tutorial, we should have our first HTML file all ready to go. Now we want to start making it look good. To do this, we’re going to learn some CSS…
Why use HTML and CSS? What’s the difference?
Glad you asked. HTML and CSS are two different types of markup (code), which have their own unique syntax (the arrangement in which code is written). There’s an important distinction between the two. You can think of the HTML as the structure for the page, while the CSS gives the HTML it’s styling.
HTML = structure
CSS = style
(By the way, HTML stands for HyperText Markup Language and CSS stands for Cascading Style Sheets, if you were wondering.)
For an amazing example of the concept of separating content from style with HTML and CSS, take a look at the site CSS Zen Garden. Really, do that now. The link will open in a new tab or window and I’ll take a coffee break.
Okay, we’re back?
Back in the day, this site was pretty inspiring—it was one of the first online examples of just how powerful this relationship between HTML and CSS actually is. As you browse through the alternate designs for the site, bear in mind that every single design uses exactly the same HTML! The only thing that changes from design to design is the CSS file. This is a great example of what can be accomplished using just CSS to change the look of a web page.
In subsequent tutorials when our code gets complex, we’ll learn just how important it is to keep the two separate. For now, let’s dig in and actually code.
Step 1
Create a new file called “style.css” and save it in the same folder as your file called “index.html”. (In the previous tutorial, we created a “website” folder. Save your CSS file there.)
Linking your HTML and CSS files
Step 2
Before we even write the CSS, we actually have to go back to our HTML. We need to write a new line to link the html file and the css file together. So, open up the index.html file from the previous tutorial and add the highlighted line of code below (line 5) to the <head> section of your document. The result should look like this:
<!DOCTYPE html>
<html>
 <head>
  <title>This is my page title.</title>
  <link href="style.css" rel="stylesheet" type="text/css" />
 </head>
 <body>
  <h1>This is a heading 1 element</h1>
  <p>Hello world, this is a simple paragraph.</p>
 </body>
<html>
This line of code links the new CSS file to your HTML file. Let’s break it down: the href attribute actually specifies the relative link to the css file. We’ll get to links later, for now, just make sure the style.css file is in the same folder as your index.html file. The rel attribute tells the browser that this is a stylesheet. The type attribute tells the browser that this linked file should be interpreted as CSS syntax.
Understanding CSS syntax
Step 3
Now on to the real CSS. The first thing we’re going to do is make the paragraph text a different color. So type or paste this into your style.css file
p {
  color:blue;
}
This looks different than the code in our HTML file because it is a different syntax. I’m going to add some whitespace and breaks to that code like this:
p {
color:blue;
}
Both of the above examples are the exact same as far as your browser is concerned. But developers usually write out CSS like the later example in order to visually separate the styles. This is helpful when your CSS files start to accumulate hundreds of different styles, and for learning what the syntax means:

The entirety of the text above is technically called a rule set, or simply rule. Its broken up into a few different parts:
In this particular rule set, we can call p a selector. (This “selects” the part of the corresponding HTML will be effected—the p {} selects the <p> in our HTML file.)
The code including and between the curly braces { } is called the declaration block.

There is a single declaration inside of our declaration block: color:blue; . Declarations are name-value pairs (similar to HTML attributes). Here, the name of the declaration is “color” and the value is “blue”. It is important to separate the name and value with a colon : and end the declaration with a semicolon ; .
Step 4
We’re going to add a new rule set to change the color of the heading, like so:
p {
  color:blue;
}
h1 {
  color:red;
}
Now our head 1 should be red and our paragraph should be blue, as seen below, and in the demo.
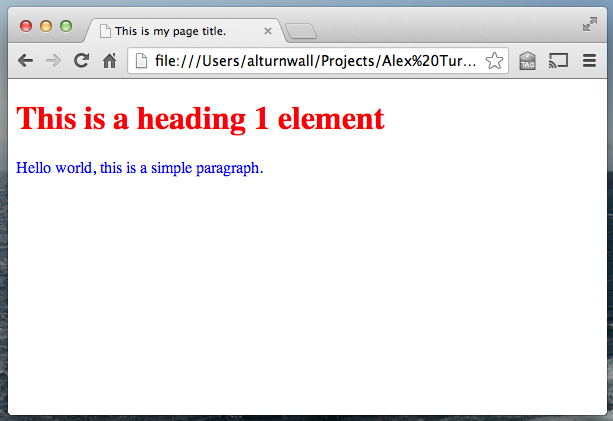
So, save your CSS file and then take a look at the corresponding HTML file in your browser to make sure yours looks like the above example.
Recap
Okay, so you just successfully used rule sets in your CSS file to change the appearance of elements in your HTML file. This is the foundation of everything we’re going to do to build our website. Make sure your code is working and you take a second to understand why this worked. Hopefully you already have some questions… we’ll continue building on this and answer those questions in the rest of the series.
Download the demo files (ZIP) to compare this code to your own.
And continue on to the next post in the series, All about relative and absolute links…
I’m a beginner and this article has really helped me alot, but I can’t still link d html and css
Kelvin, take a look at the code above for the following line:
Make sure the value for href (here it’s style.css) is exactly equal to the name of your own style file, noting that it is case sensitive. Also make sure your style.css file and index.html file are in the same folder. Check the link about to download the demo files if you’re still having trouble and check to see if anything is different than your own files. Good luck!
Here is how css and html work tgether and generate web pages
http://www.corelangs.com/css/basics/work.html
css tutorial
SURE THIS IS GOOD, it has me made expert in programming……..
Thanks! So helpful!!
i have this question and it says how does HTML AND CSS work together? how
I’m trying to learn how html and css works together for the development of an epub. is there any tutorial on this?
Thank you for your explanation. Very helpful!